 |
Link to Photos
To link the photos you need to specify the URL of a directory that contains the photos for the selected user type.
|
|
When you link photos, Studywiz does not store the images on its server – it simply references the images located at the URL. Should the URL be unavailable for some reason, Studywiz will not be able to display the user photos. |

1. Ensure that the photos are JPEG image files. The Studywiz Bulk Photo Import tool accepts JPEG image files only.
2. Save the photos at the root level of the specified URL. An example of a URL might be: http://Studywiz.myschool.net/photos/students/
|
|
Ensure that the http:// prefix is included in the URL, and that the URL is publicly accessible (or internally accessible by the Studywiz server). |
3. Ensure that the file names are in the following format:
<user type identifier>_<External ID>.jpg
• The 'user type identifiers' for Students, Teachers and Parents are ‘S’, ‘T’, and ‘P’ respectively.
• The External ID value is the user’s Studywiz External ID.
• Some examples of appropriate file names are:
S_319391A.jpg
T_9881.jpg
P_extpid441.jpg
4. Ensure you are logged into Studywiz as an administrator.
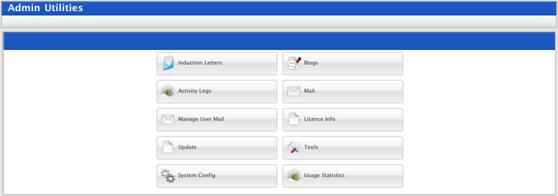
5. On the admin menu bar, click Admin Utilities. The Admin Utilities page appears.
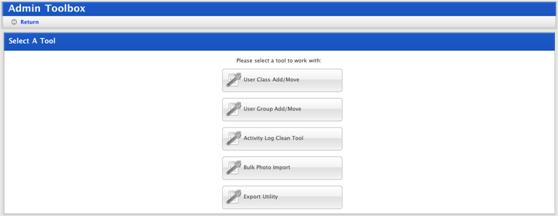
6. Click the Tools button. The Admin Toolbox page appears.
7. Click the Bulk Photo Import button. The Bulk Photo Import page appears.
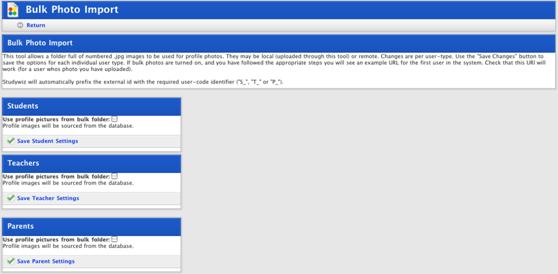
The Bulk Photo Import page contains four main panels – one is a description of the tool, the other three control the settings for each user type (Students, Teachers and Parents).
8. For the user type for which you want to import photos, select the Use profile pictures from bulk folder option. The <user type> panel expands to reveal the Bulk Photo settings for the selected user type:
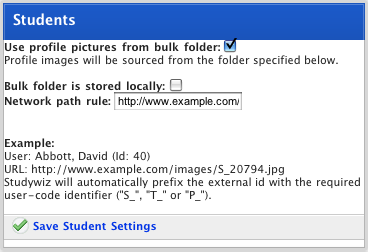
9. In the Network path rule field, type or paste the URL of the directory that contains the photos for the selected user type.
10. Click Save <user type> Settings.
|
|
The Generating New User Templates screen may appear briefly. |
The link bulk photos process is now complete. If configured correctly, a user's photo will be loaded directly from the specified URL when viewing his/her user details.