 |
Create an Advanced Assessment from a Template
Follow this procedure to create an Advanced Assessment from an Assessment Template. You can create an Advanced Assessment from either a Simple Assessment Template or from an Advanced Assessment Template. If you create it from a Simple Assessment Template, you convert the Assessment to an Advanced Assessment to gain access to the advanced features.
1.†††††† On the admin menu bar, click Admin Utilities. The Admin Utilities page appears.
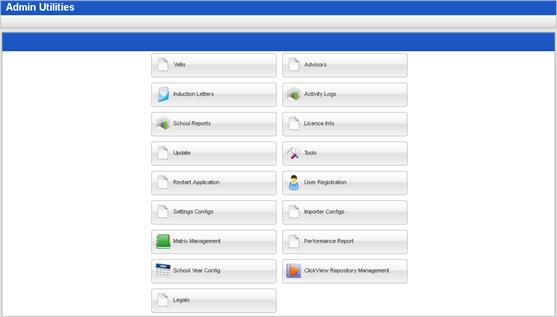
2.†††††† Click the Matrix Management button. The Learner Matrix Management page appears.

3.†††††† Click the Assessments button. The Assessments page appears.
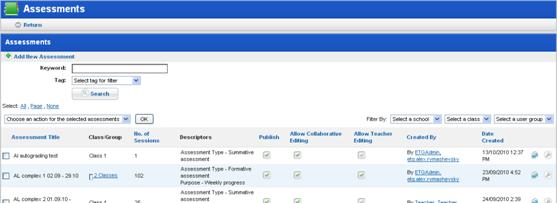
4.†††††† Click Add New Assessment. The Add New Assessment panel appears.

5.†††††† Ensure that the Create From Template option is selected. The adjacent drop-down list is activated.
6.†††††† From the drop-down list, select an Assessment Template.

7.†††††† Click the Add New Assessment button. The Assessment fields appear in the panel.
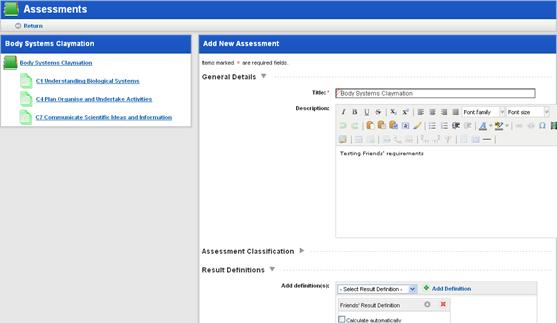
a.†††††† If you used a template for a Simple Assessment, click Convert this assessment to an advanced assessment. The Advanced Assessment page appears.
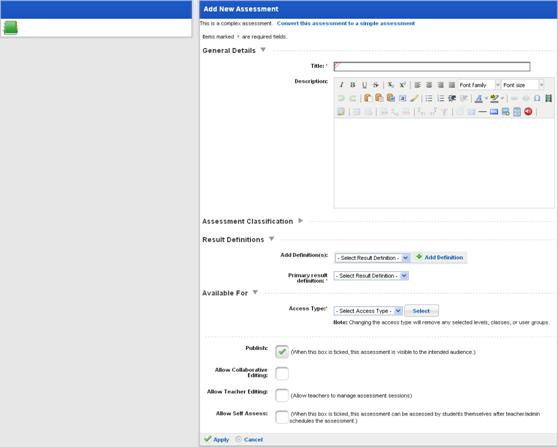
8.†††††† Complete the fields for the Assessment:
a.†††††† In the General Details section, enter a Title* and Description.
b.†††††† Expand the Assessment Classification section, and select any appropriate tags from the drop-down lists. If you donít want to classify the Assessment, you can leave these fields blank.
|
|
The Assessment content is defined by its Result Definitions. Use this section to add different types of results to the Assessment and to select one result as the primary result. The primary result is the one that will appear wherever a single results from the Assessment is displayed. Result Definitions can be customised by following the procedures in the Result Definitions section. |
c.†††††† In the Result Definitions section:
i.††††††† From the Add definitions drop-down list, select a Result Definition
ii.†††††† Click Add Definition. The Definition is applied to the Assessment.
iii.††††† Use the up and down arrows to order the Definitions.
iv.†††††† From the Primary result definition drop-down list, select one definition as the primary definition.
a.†††††† In the Available For section:
i.††††††† From the Access Type list, select Classes or Groups.
ii.†††††† Select a Class or Group as appropriate.
iii.††††† Set a date for the Assessment.
9.†††††† To make the Assessment available, select the Publish checkbox.
10.†††† If you want to allow other users to edit the Assessment, select the Allow Collaborative Editing checkbox.
11.†††† If you want teachers to be able to manage Assessment sessions, select the Allow Teacher Editing checkbox.
12.†††† If you want students to be able to mark their own assessment, select the Allow Self Assess checkbox.
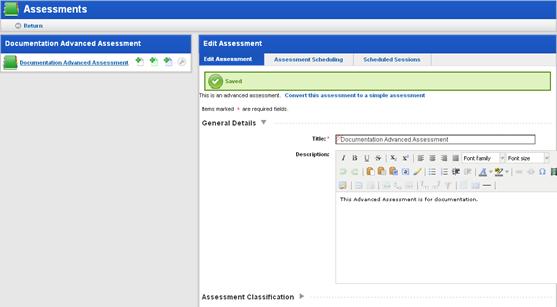
13.†††† Click Apply. The Assessment is saved. The buttons for managing Tasks, Criteria Groups and Competency Groups appear in the left panel and the scheduling tabs appear in the right panel.
14.†††† Add any Tasks, Criteria Groups and Competency Groups that you need. See the Manage Tasks, Criteria Groups and Competency Groups section for instructions.
15.†††† Schedule the Assessment. See the Schedule an Advanced Assessment section for instructions.
16.†††† Click Apply. Changes to the Assessment are saved.
