 |
Find ‘Orphaned’ Users and add them to a Group
There is a possibility that there are users in the system who are not assigned to any Groups. Whilst it is not essential that every user is a member of a Group it may be useful to find such users. Follow the steps in this procedure to find orphaned users and assign them to a Group.
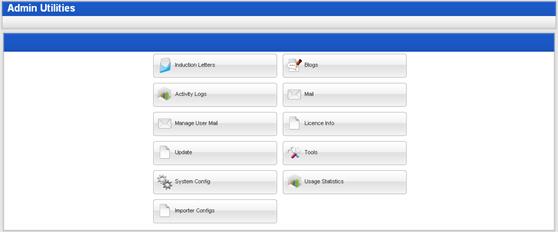
1. On the admin menu bar, click Admin Utilities. The Admin Utilities page appears.
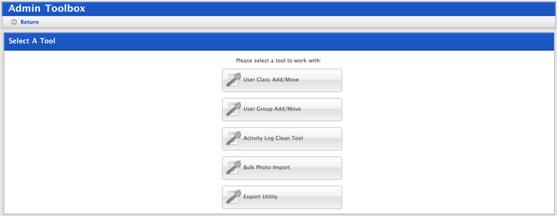
2. Click the Tools button. The Admin Toolbox page appears.
3. Click the User Group Add/Move button. The User Group Add/Move page appears.
4. In the Manage Group panel select the Unassigned Users option.
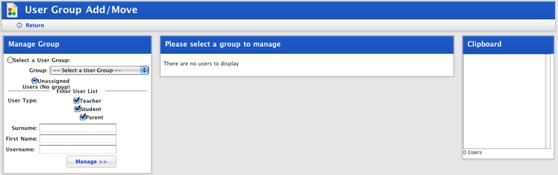
5. In the Filter User List area enter any information you have about the unassigned user you need to find.
|
|
To find all unassigned users leave the User Type checkboxes selected and the other fields blank. |

6. Click the Manage button. The Unassigned Users panel appears and displays all users found.
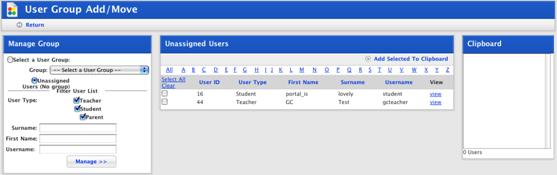
7. Use the checkboxes to select the users you want to move.
|
|
Use the Select All and Clear links to select or deselect all users. The View links open the User Details pages. Sort the list by clicking the headers. |
8. Click Add Selected To Clipboard. The selected users are added to the Clipboard.
9. In the Manage Group panel select the Select a User Group option.
10. In the Manage Group panel select the Group to which you want to add the users.
11. Click the Manage button. The <Group name> panel appears.
12. In the Clipboard panel select the users you want to add to the Group.
13. Click Add Selected. The selected users are added to the Group.