 |
Create a School Group
A School Group exists entirely within a School. Create a School Group if you want the Group to be available only within one own school in a multi-school deployment.
1. Click Hierarchy Management and then click User Groups. The User Groups panel appears.
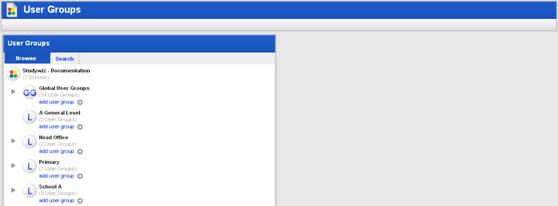
2. Under the School for which you want to create the new Group, click add user group. The New User Group panel appears.
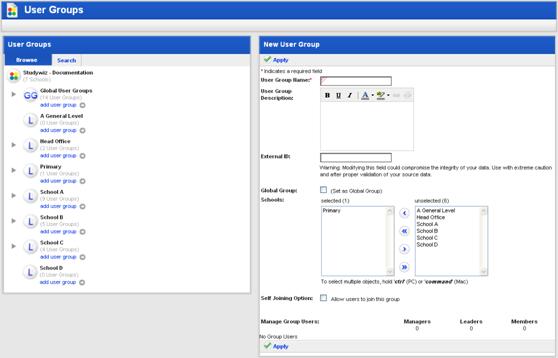
3. In the User Group Name field, type the name of the new Group.
4. In the User Group Description field, type a description of the Group.
|
|
This description is visible to other users and will help them to decide whether or not they want to join the Group. |

5. If you want to make the Group available to more than one School, from the unselected field, select the school(s) that you want the Group to belong to and click the Add button. The selected schools are added to the selected field.
6. Set the Group’s Joining Options according to the procedure in the Set a Group’s Joining Options section.
7. Click Apply. The Group is saved and the Manage buttons appear.

8. Add users to the Group according to the instructions in the Add Users to a Group section.
9. Click Apply. The Group is saved.